Customize WooCommerce Checkout Fields – Complete Guide
Customizing the checkout fields in WooCommerce is essential for tailoring the checkout experience to fit your specific business needs and improve customer satisfaction. Whether you need to remove unnecessary fields, change field requirements, add custom fields, reorder fields, or apply custom classes, WooCommerce provides flexible options to customize the checkout process according to your preferences. In this comprehensive guide, we’ll explore various techniques for customizing WooCommerce checkout fields step-by-step.
Why Customize Checkout Fields
The default checkout fields in WooCommerce may not always align with your business requirements or customer preferences. Customizing checkout fields allows you to streamline the checkout process, gather relevant information from customers, and create a personalized shopping experience. Whether you’re simplifying the checkout form, collecting additional customer details, or enhancing the user interface, customizing checkout fields can significantly impact the efficiency and effectiveness of your online store’s checkout process.
Understanding Checkout Fields
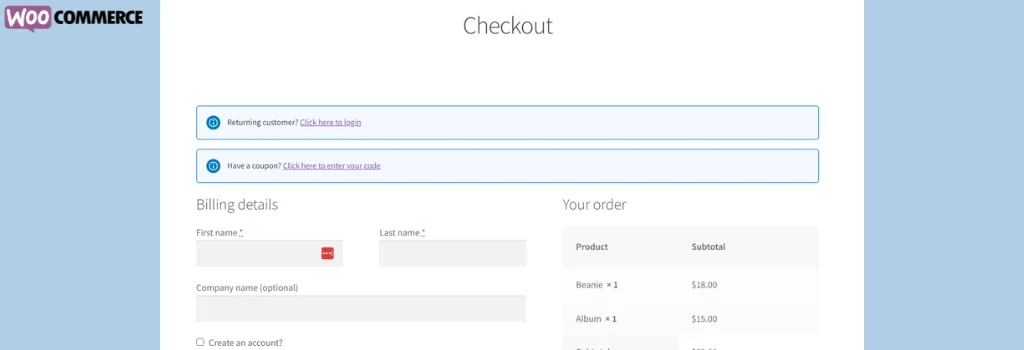
Before diving into customization options, let’s familiarize ourselves with the different types of checkout fields available in WooCommerce:
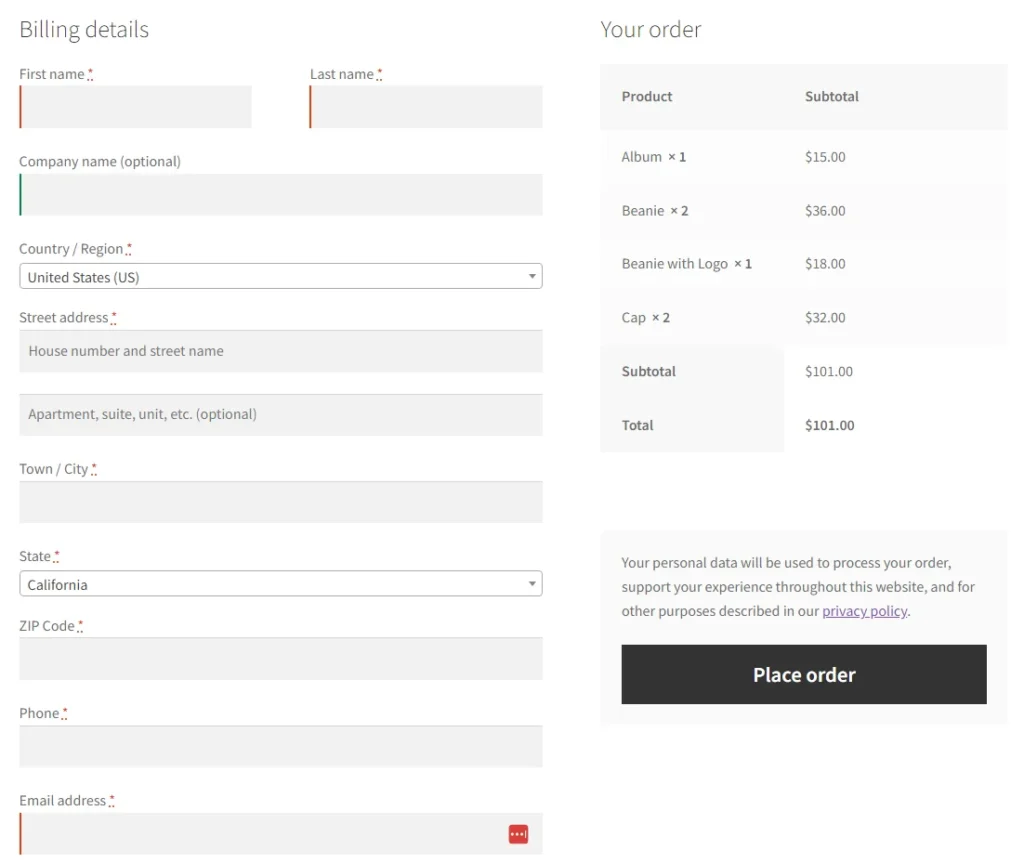
Billing Fields
billing_first_name
billing_last_name
billing_company
billing_country
billing_address_1
billing_address_2
billing_city
billing_state
billing_postcode
billing_phone
billing_email
Shipping Fields
billing_first_name
billing_last_name
billing_company
billing_country
billing_address_1
billing_address_2
billing_city
billing_state
billing_postcode
Customer Fields
account_username
account_password
Order Fields
order_comments
Now, let’s explore various customization options for each type of checkout field
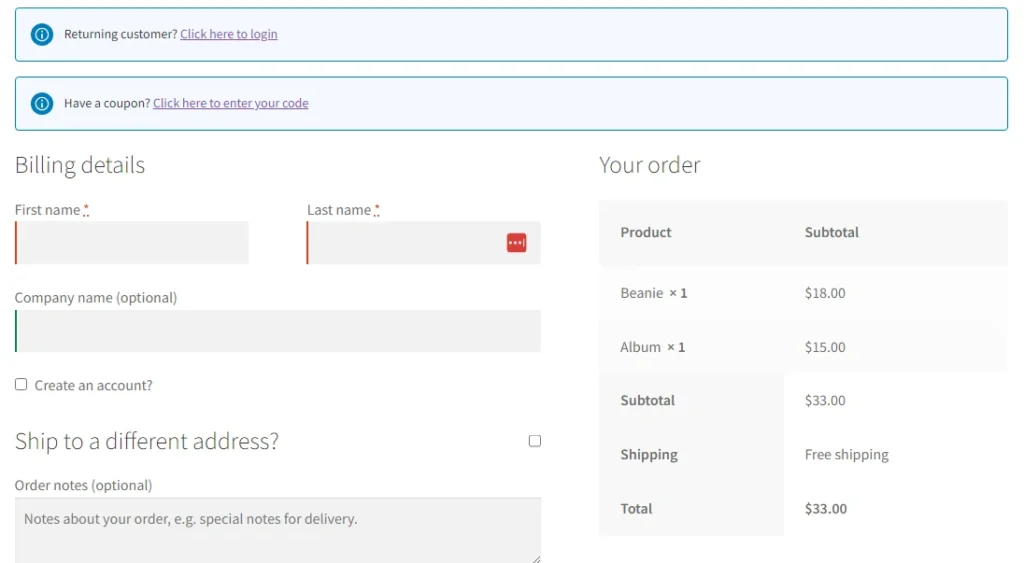
1) Remove Checkout Fields
To remove specific checkout fields, you can use the following code snippet:
Example: Allow the company name field only.
add_filter( 'woocommerce_checkout_fields', 'wc_custom_remove_checkout_fields', 100, 1 );

function wc_custom_remove_checkout_fields( $fields ) {
	unset( $fields['billing']['billing_city'] );
	unset( $fields['billing']['billing_country'] );
	unset( $fields['billing']['billing_state'] );
	unset( $fields['billing']['billing_phone'] );
	unset( $fields['billing']['billing_postcode'] );
	unset( $fields['billing']['billing_address_1'] );
	unset( $fields['billing']['billing_address_2'] );
	unset( $fields['billing']['billing_email'] );
  // Remove additional fields as needed
  return $fields;
}
Example, Remove the order notes field:
add_filter( 'woocommerce_checkout_fields', 'wc_custom_remove_checkout_fields', 100, 1 );

function wc_custom_remove_checkout_fields( $fields ) {
  unset( $fields['billing']['billing_city'] );
	unset( $fields['billing']['billing_country'] );
	unset( $fields['billing']['billing_state'] );
	unset( $fields['billing']['billing_phone'] );
	unset( $fields['billing']['billing_postcode'] );
	unset( $fields['billing']['billing_address_1'] );
	unset( $fields['billing']['billing_address_2'] );
	unset( $fields['billing']['billing_email'] );
	unset( $fields['order']['order_comments'] );
  // Remove additional fields as needed
  return $fields;
}
2) Switch Fields between Optional and Required
You may also want to adjust the requirement status of certain fields. For example, you might want to make an optional field required or vice versa. Here’s how you can achieve this using a code snippet:
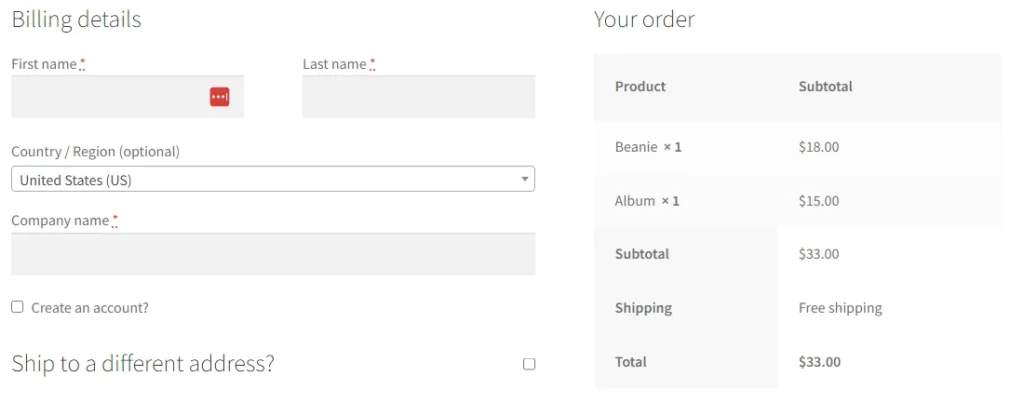
Example: Make the billing country field an optional field and the Company field a required field.
add_filter( 'woocommerce_checkout_fields', 'wc_adjust_checkout_fields', 100, 1 );

function wc_adjust_checkout_fields( $fields ) {
    // Change requirement status of specific fields
    $fields['billing']['billing_country']['required'] = false;
    $fields['billing']['billing_company']['required'] = true;
    return $fields;
}
Now the company field is required and the country field is optional.
3) Change Field Order
Changing the order of checkout fields allows you to prioritize certain fields over others.
Each field has a priority value the bigger the value the last the field will become.
Here’s how you can change the order of fields using a code snippet:
Example: Moving the company field below by increasing the priority value of the field.
add_filter( 'woocommerce_checkout_fields', 'wc_reorder_checkout_fields', 100, 1 );

function wc_reorder_checkout_fields( $fields ) {
    // Change the priority of specific fields
    $fields['billing']['billing_company']['priority'] = 50;
    return $fields;
}
4) Add Custom Classes to Fields
Adding custom classes to checkout fields allows you to apply custom styling or functionality to specific fields. Here’s how you can add custom classes using a code snippet:
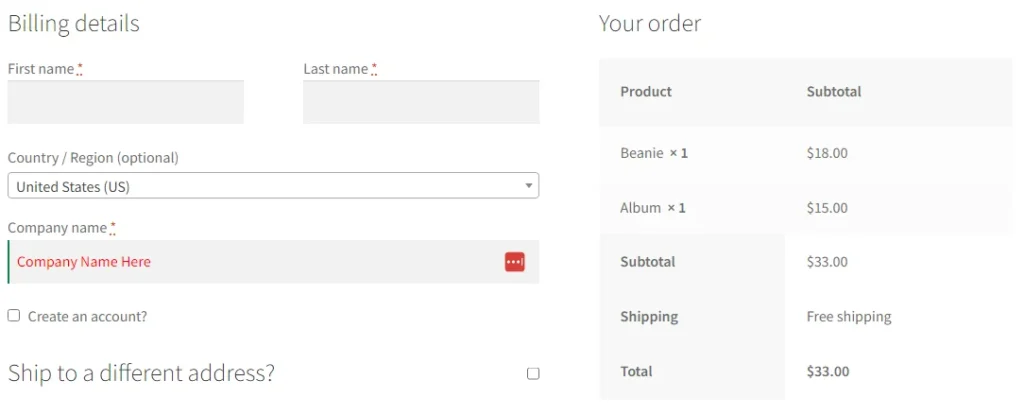
Example: adding custom class “text-red” to company field
add_filter( 'woocommerce_checkout_fields', 'wc_custom_class_checkout_fields', 100, 1 );

function wc_custom_class_checkout_fields( $fields ) {
    // Add custom class to specific field
    $fields['billing']['billing_company']['class'][] = 'text-red';
    return $fields;
}
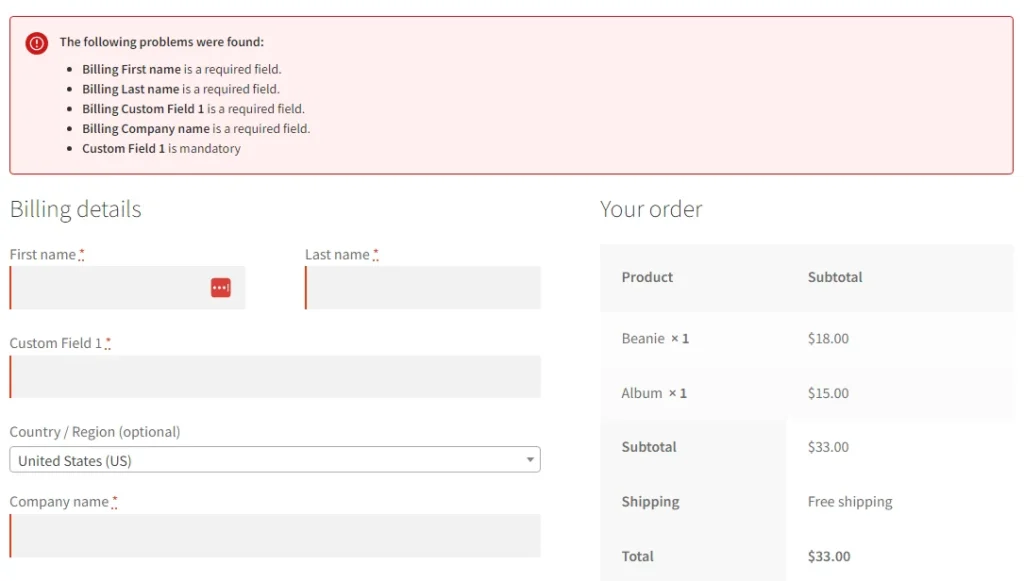
5) Add Custom Fields
Adding custom fields to the checkout form allows you to collect additional information from customers. This process involves three stages: registering and displaying the field, validating the field, and saving the field. Here’s how you can add a custom field:
a) Register and Display Field:
add_filter( 'woocommerce_checkout_fields', 'wc_custom_checkout_fields', 100, 1 );

function wc_custom_checkout_fields( $fields ) {
    // Register and display custom field
    $fields['billing']['wc_custom_field_1'] = array(
        'type'     => 'text',
        'label'    => esc_html__( 'Custom Field 1', 'woocommerce' ),
        'required' => true,
        'priority' => 20,
    );
    return $fields;
}
b) Validate the Field:
This step is for validating the field and showing the appropriate error message if the field fails the validation.
add_action( 'woocommerce_after_checkout_validation', 'wc_validate_custom_checkout_fields', 100, 2 );

function wc_validate_custom_checkout_fields( $data, $errors ) {
    // Validate custom field
    if ( empty( $data['wc_custom_field_1'] ) ) {
		  $errors->add( 'wc_custom_field_1_validation', '<strong>' . esc_html__( 'Custom Field 1', 'woocommerce' ) . ' </strong>' . esc_html__( ' is mandatory', 'woocommerce' ) );
    }
}
c) Save the Field:
add_action( 'woocommerce_checkout_create_order', 'wc_save_custom_checkout_fields', 100, 2 );
function wc_save_custom_checkout_fields( $order, $data ) {
// Save custom field
if ( ! empty( $data['wc_custom_field_1'] ) ) {
$order->update_meta_data( 'wc_custom_field_1', $data['wc_custom_field_1'] );
}
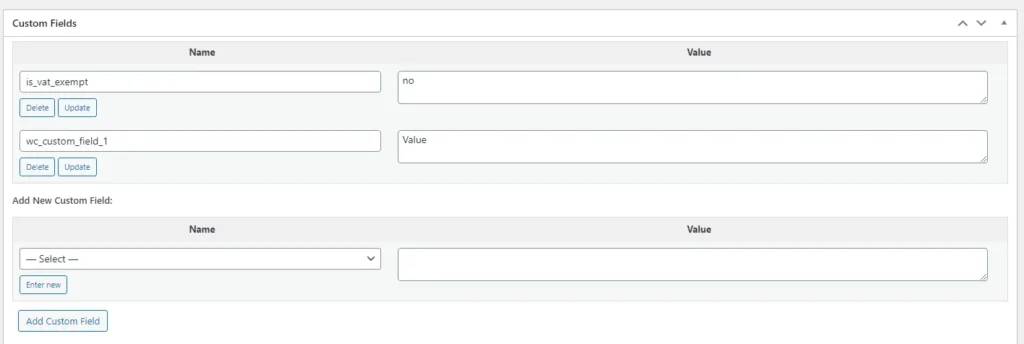
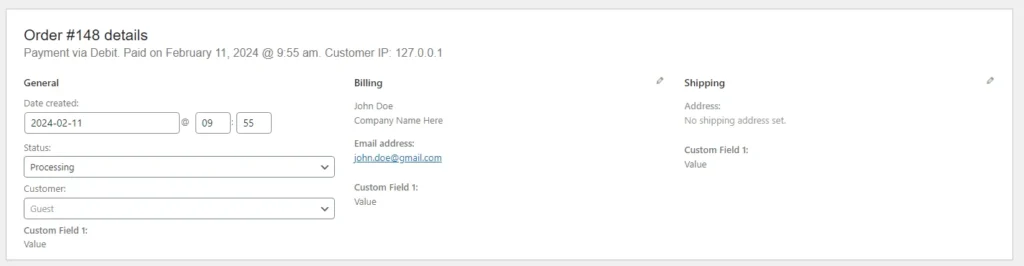
}At this point, the custom field is ready to be used. The field value can be seen inside the order’s Custom Fields section.
d) Optional: Show the Field in the Order Details Section in Admin Side:
To better display the custom field value in the order details box. you can use this code snippet.
// General Data Column.
add_action( 'woocommerce_admin_order_data_after_order_details', 'wc_show_custom_checkout_field_admin_side', 100, 1 );
// Billing Data Column.
add_action( 'woocommerce_admin_order_data_after_billing_address', 'wc_show_custom_checkout_field_admin_side', 100, 1 );
// Shipping Data Column.
add_action( 'woocommerce_admin_order_data_after_shipping_address', 'wc_show_custom_checkout_field_admin_side', 100, 1 );

/**
 * Show Custom Field in Admin Side.
 *
 * @param \WC_Order $order
 * @return void
 */
function wc_show_custom_checkout_field_admin_side( $order ) {
	?>
	<p class="form-field form-field-wide wc-customer-user">
		<strong><?php echo esc_html__( 'Custom Field 1:', 'woocommerce' ); ?></strong>
		<br/>
		<span><?php echo esc_html( $order->get_meta( 'wc_custom_field_1' ) ); ?>
	</p>
	<?php
}
This code will display the custom field value in the order details three columns. It’s up to you to choose a column based on the corresponding column filter in order.
Customizing WooCommerce checkout fields gives you the flexibility to create a seamless and personalized checkout experience for your customers. Whether you need to remove unnecessary fields, add custom fields, or adjust field requirements, WooCommerce provides powerful customization options to suit your business needs. Implement these customization techniques to optimize your checkout process and enhance the overall shopping experience for your customers.
Looking for WooCommerce plugins?
GrandPlugins — Lightweight WordPress & WooCommerce Plugins
Cart control, pricing rules, media watermarking & more. Affordable and actively supported.