How to disable image sizes in WordPress
WordPress, by default, creates different sizes for every image you upload to your site. However, there may be times when you want to disable this feature. Perhaps you don’t use all the sizes WordPress generates, or you want to save server space and boost site performance. Whatever the reason, disabling unnecessary image sizes can be beneficial for your site. This post will guide you through the process of disabling custom image sizes in WordPress.
Why You Might Want to Disable Image Sizes
Here are a few reasons why you might want to disable certain image sizes in WordPress:
- Save Storage Space: Each image size generated by WordPress consumes server storage space. If you’re not using certain image sizes, disabling them can save significant storage space.
- Improve Site Performance: Reducing the number of image sizes can also help improve the performance of your website. Fewer image sizes mean fewer resources are used when uploading and processing images.
- Streamline Your Media Library: Disabling unnecessary image sizes can help streamline your media library and make it easier to manage.
Disable Image Sizes Code Snippet
WordPress provides a filter hook intermediate_image_sizes_advanced to adjust the image subsizing before making the image sizes.
Let’s look at an example. You can add the following code to your theme’s functions.php file:
// Remove Disabled sizes before subsizing.
add_filter( 'intermediate_image_sizes_advanced', 'disable_subsizes', 100, 2 );

/**
 * Add Custom Image Size.
 *
 * @param array $new_size
 * @param array $image_meta
 * @return array
 */
function disable_subsizes( $new_sizes, $image_meta ) {
	unset( $new_sizes['medium'] );
	unset( $new_sizes['1536x1536'] );
	return $new_sizes;
}
In this example, we’re disabling the medium and 1536×1536 WP standard sizes.
all you need to do is adding the line unset( $new_sizes['subsize-name-here'] ); and the size will be disabled.
How to Use the Code snippet
You can implement this snippet by following on of these steps:
- Child Theme: If you’re using a custom child theme, you can add the snippet to the
functions.phpfile of your child theme. This ensures that the functionality remains intact even when you update your theme. - Custom Plugin: A better way, you can create a custom plugin to add the snippet. Creating a custom plugin allows you to keep your code separate from the theme files, making it easier to manage and maintain. You can use our online tool WP Plugin Creator to generate a custom plugin with the snippet included. Simply paste the snippet into the plugin code editor, specify the plugin name, and download the generated plugin zip file.
A Simpler Way with Image Sizes Controller Plugin
If you prefer a more user-friendly way, consider using our plugin Image Sizes Controller plugin ↗.
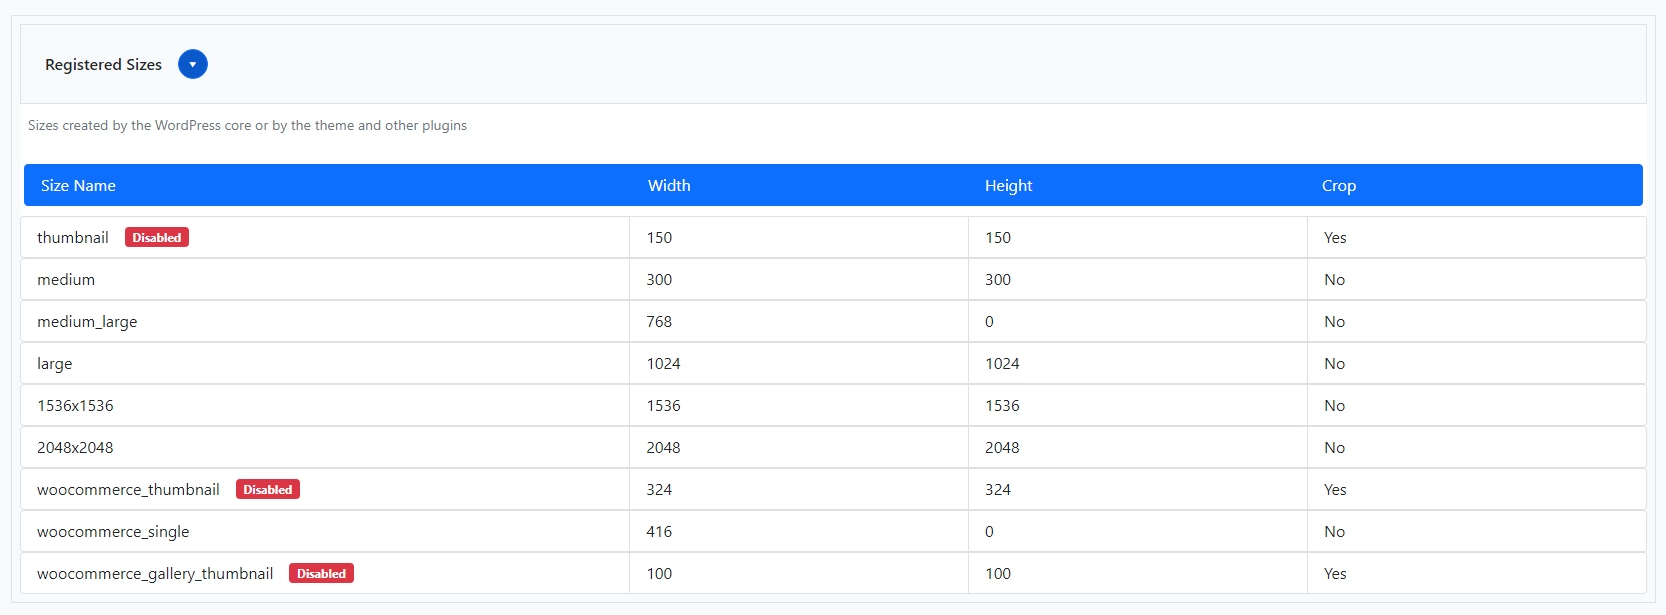
The plugin provides an intuitive interface to disable any image size. You can check what image sizes are registered in your website from the image.
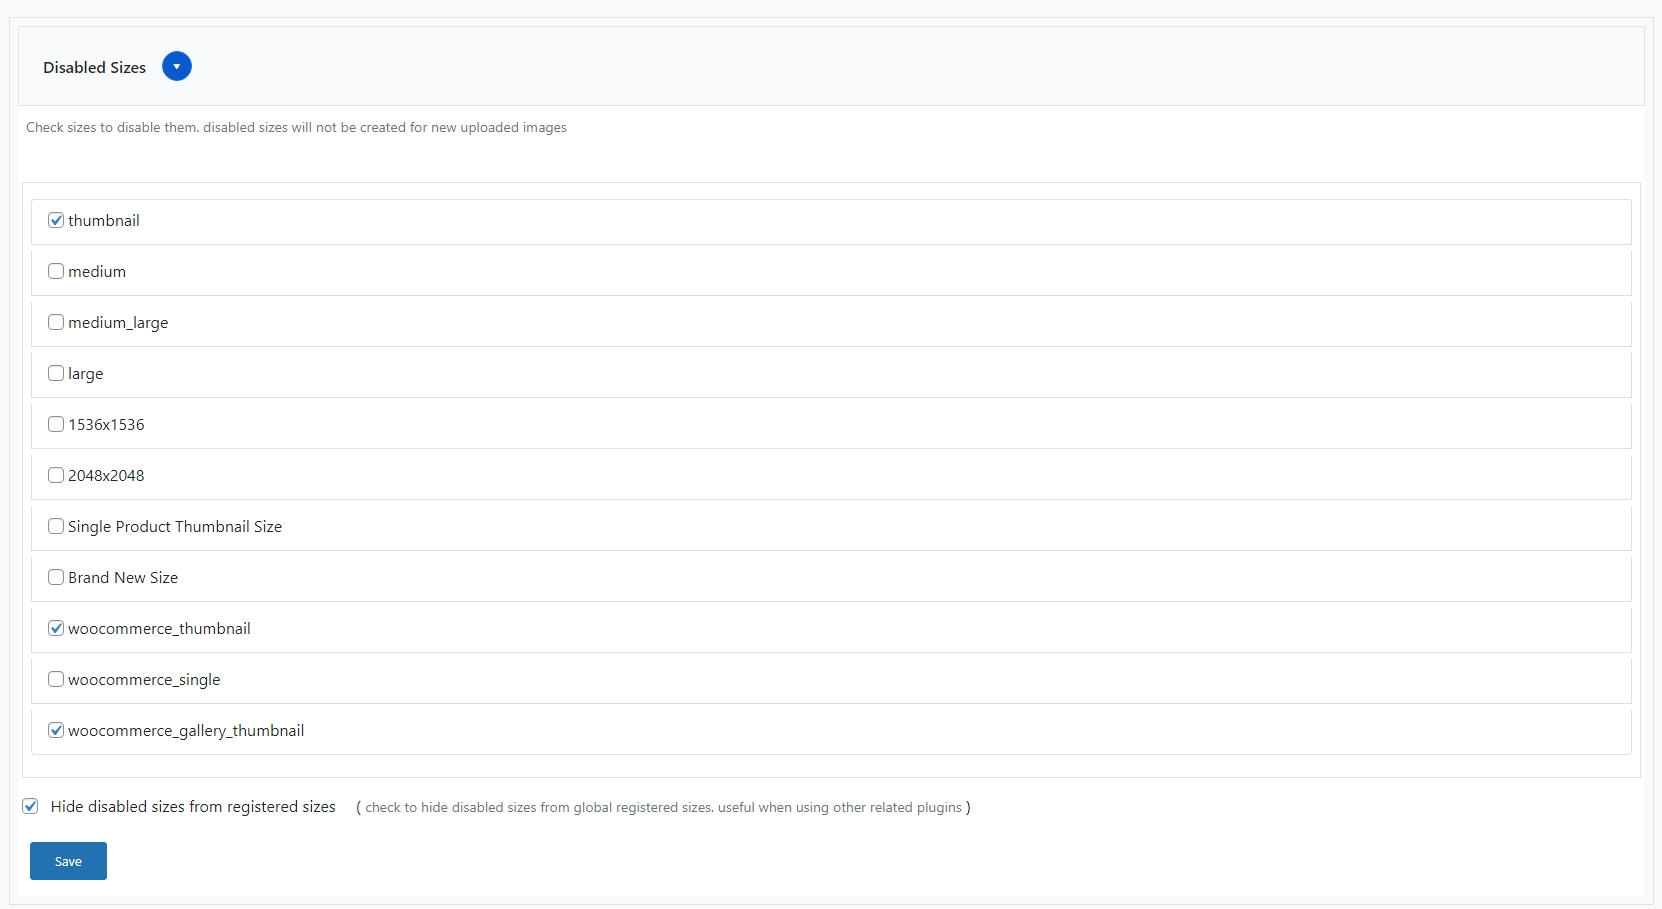
Then, you can disable any image size from being created for new uploads by checking the image sizes and hit save.
Conclusion
Disabling unnecessary custom image sizes in WordPress can help optimize your site’s performance, save server space, and streamline your media library. Whether you choose to do so by editing your theme’s functions.php file or using a convenient plugin like Image Sizes Controller ↗., the result is a more efficient, well-optimized website. Happy optimizing!